
This is "Poinsettia Winter Wishes".
This card I did for the Inspiration challenge at Splitcoaststampers.com. This week we are visiting Frankie Print Co. My inspiration came from this powder room.

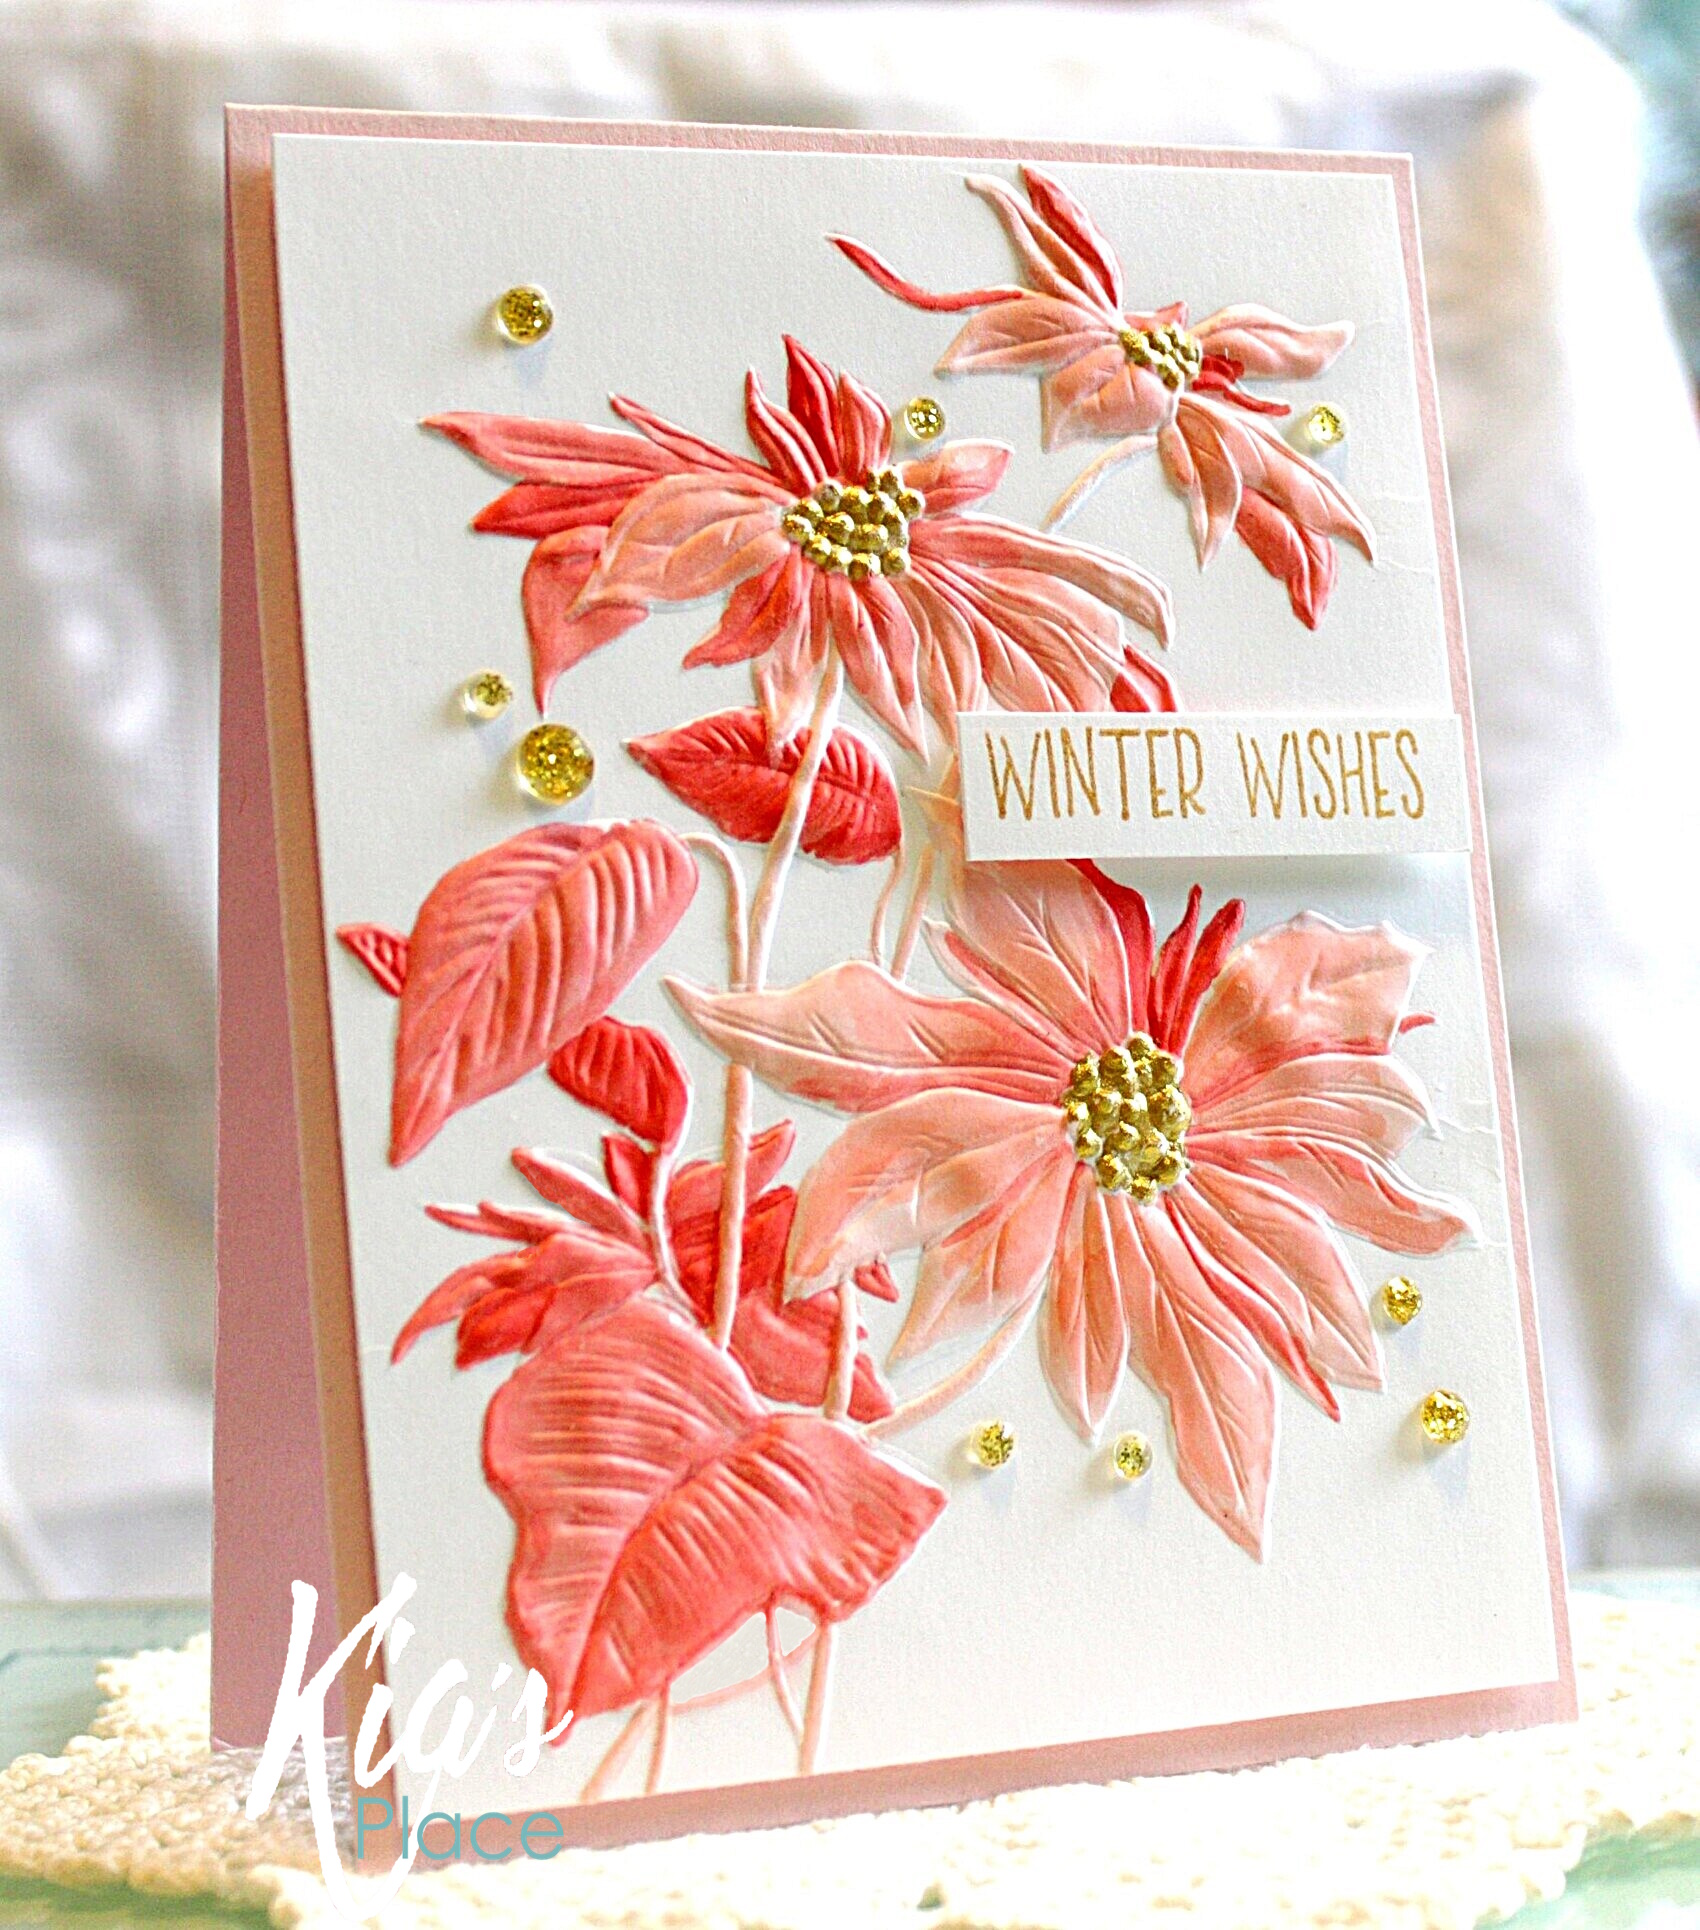
*Adding: I did not make it clear that I first spritz my cardstock front and back with water, then place it in the embossing folder and run through using my Gemini Jr., which I do twice to ensure a good emboss.
To colour I used Copic markers in various shades of pink, being R11, R20, R22, R30 and R14, colouring in a loose style.
For the Poinsettia centre I sprinkled a bit of Perfect Pearls Sunflower Sparkle on my work top, and added a bit of water then painted the flower centres in the gold.

For my card base I picked Taylored Expressions Cupcake cardstock in that pretty pale pink. To the card base I attached the Poinsettia panel using foam tape.
I then added Studio Katia gold gems around the flowers of the Poinsettia, to mimic the flower centres using Art Glitter glue to adhere.

In my mini Misti I stamped the sentiment taken from the Woodware Winter Trees stamp set, using Delicata Golden Glitz ink.
After trimming the sentiment panel, I applied foam squares to the back and attached it to the card base.
It has been awhile since I coloured an embossing folder in this manner, so it was a nice change, especially given I have been building my ink pad holder, which takes a long time believe it or not.
Here is a quick peek, yes I am really building it! This picture shows some of the core board weighing down a newly glued box for the ink pads.
Thank you for joining me today. Following are Affiliate links for the products I have used for this card, at no extra cost to you.
First thing I thought when I saw your beautiful card was "how did she get all that texture?" then I red the entire post and realized at the end that you used an embossing folder. I've tried coloring on EF raised cards and always gave up; it's hard to do. Your card is gorgeous, Kia! Also can't wait to see the final result of your project.
ReplyDeleteQuestion... do you color the embossed image? or put the color on the folder? How do you keep your lines so clean if the image is colored?
ReplyDeleteThe image is embossed before I colour. I am careful with my colouring, I would rather leave white space than go over the edge.
DeleteStunning and you answered my question in my group re the R colours... love this xx
ReplyDelete