

Shaving Cream Plus Ink.
This will be a different kind of post today as I am showing prints done using Shaving Cream plus Inks for the Scrap'n Stamp Blog. I hope my readers will enjoy this technique as well.
All month long Scrap'n Stamp is holding daily challenges. Today is Day 17, and that means it is my turn. I picked one of my favourite techniques to do, Shaving Cream Stencilling.
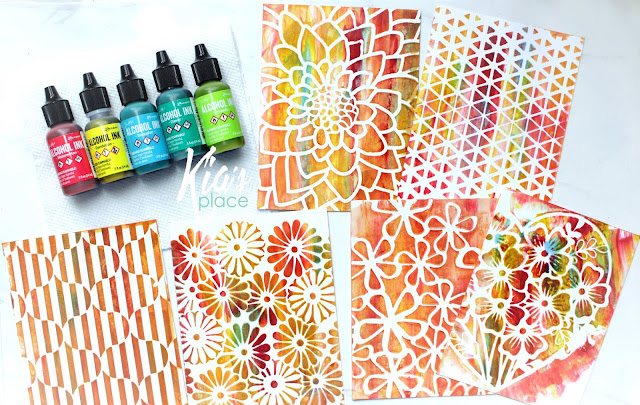
This is a fun technique and it cleans up easily. When I first watched the Video detailing this technique I noted that the ink Lydia used was water based ink, being Reinkers. I only have a few reinkers, due to storage restraints, so I also used my Alcohol inks, and did not have any problems with it. The colours were still vibrant, or subdued, depending on what I wanted to do.

Today I did some small batches. You can make bigger batches of the shaving cream mixture to get many more backgrounds. I think I ended up with 14, which is perfect for me.
Following are pictures of alcohol ink backgrounds made using this technique in softer tones.
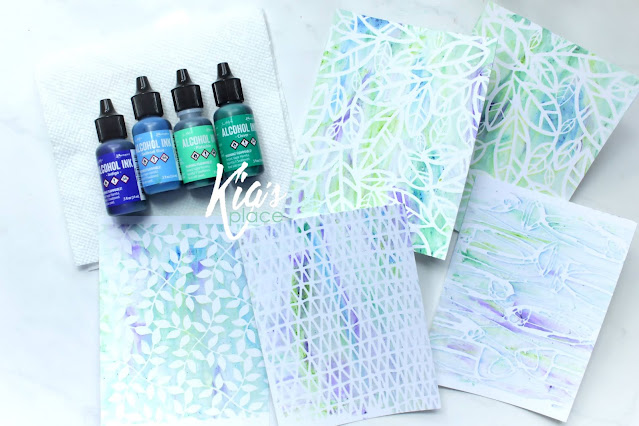
I love this set of backgrounds. The colours have me smiling. I have used a mix of Picket Fence Stencils and A Colorful Life Stencils. Remember when shopping at A Colorful Life Design to use my discount code Kia10.
What I do: I do not buff my pieces, nor do I drag the credit card across the finished design usually.
I tend to like them to remain crisp. So, I let them sit, for awhile, today being 90 minutes. Even then the inks are not completely dry.
You can dry with your heat gun I suspect, although I have never tried that, so I can't recommend it. When I am taping the backs to attach to my card bases I lay it out on paper towel, which does not damage the inks.
I die cut my pieces using Freezer Paper, so the ink will not transfer to my plates and it keeps the prints clean.
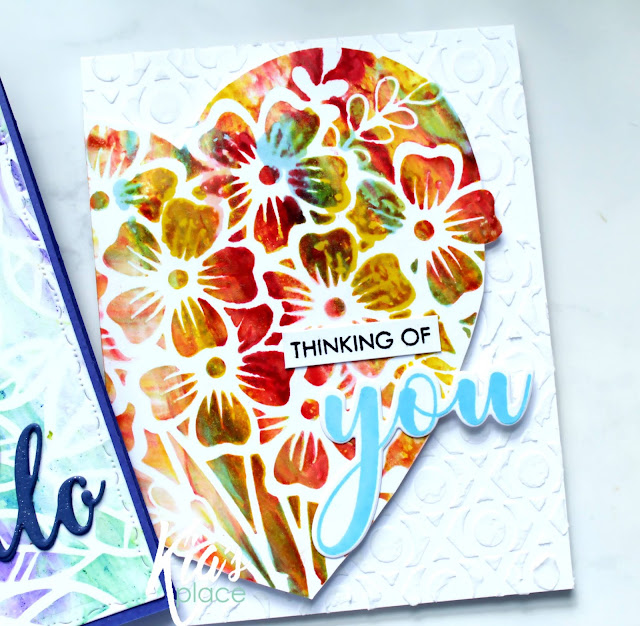
I kept my cards today Clean and Simple, adding only the sentiments, either by stamping or die cutting.
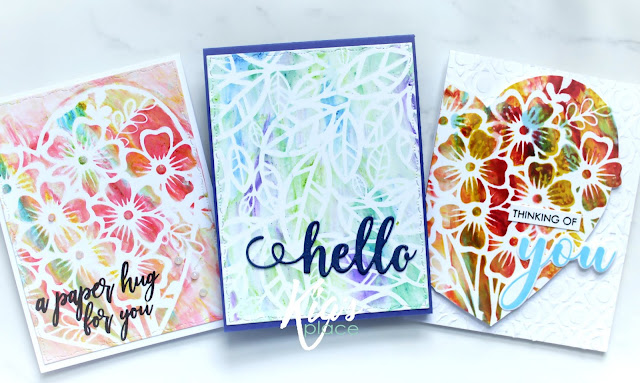
The Heart on the left I die cut with my rectangle Penny Black die.I stamped the sentiment using VersaFine Clair ink and added some Nuvo Glitter drops to the centres of the flowers and a few coming down the right side.

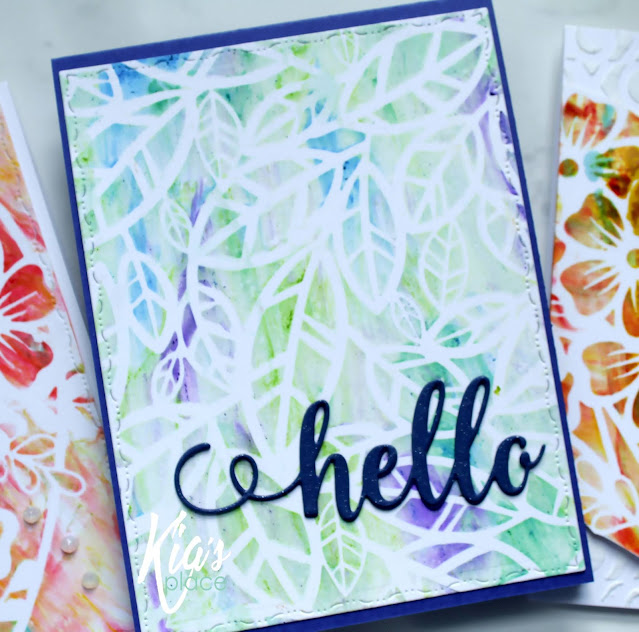
The card in the middle is done using a Picket Fence stencil of leaves, which I love. I die cut the piece using the same Penny Black die and added the Hello die cut which is cut three times and glued together with Nuvo Aqua Glimmer Gloss over it.
For the third card using Stencil Paste I stencilled my card base with A Colorful Life Design stencil in Opaque Matte. The Heart I fussy cut and it is glued at the left side of the card and has foam squares under the right of the card. The die hangs off the edge supported by a cut foam square. I stamped the smaller sentiment and glued it to the card.
And when shopping at Scrap'n Stamp remember to use my discount code 10Kia.
For a discount at A Colorful Life use code Kia10.
I had a lot of fun making these cards, and I hope you will give this technique a try.
Following are Affiliate Links to the products that I have used for these cards today, at no extra cost to you.
0 comments
Thank you very much for commenting. I love to read what you have to say and appreciate the time you take. I monitor comments to keep those spammers out, so do not be surprised if you do not see your comment straight away.